GAP Help
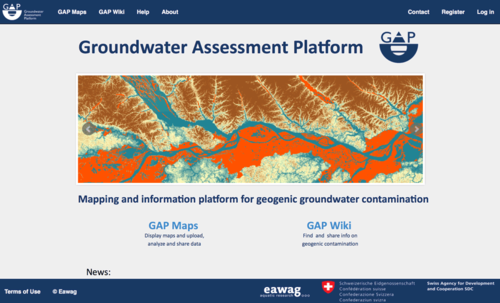
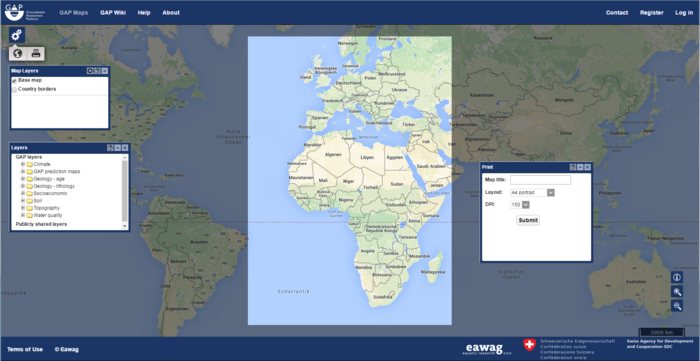
The Groundwater Assessment Platform (GAP; www.gapmaps.org) hosts information on geogenic contamination of groundwater by arsenic and fluoride. It provides the possibility to share data, case studies and field experiences as well as to interact with other users and create probabilistic maps for any area on the globe. The site has two main sections (Figure 1). In GAP Maps, you can display and print existing data and models as well as manipulate and model your own data and create hazard maps. The GAP Wiki contains diverse information on geogenic contamination.
The Help section provides instructions for using the GAP Maps section.
Contents
Viewing geospatial data (without registration)
All of the publicly available maps and data can be viewed and printed without registering on the site.
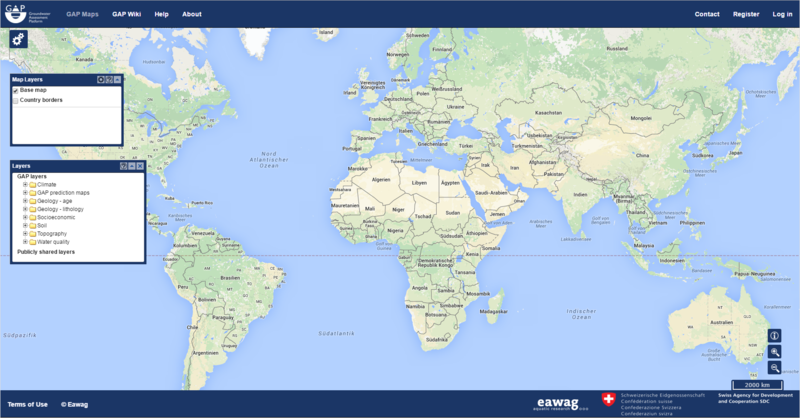
Click on ![]() to open a list of all available layers. Click on
to open a list of all available layers. Click on ![]() to print the currently viewed map as a PDF.
to print the currently viewed map as a PDF.
In case you have questions or require help while using the site, you can click on Help in the top bar to open the help page, which explains all of the features of GAP Maps. Alternatively, click the question mark ![]() in the upper-right corner of any window to open the help page relevant to that window.
in the upper-right corner of any window to open the help page relevant to that window.
Viewing geospatial data and developing models (with registration)
To be able to upload your own data and create models, you must register or log in (1). This makes the full functionality of the site available.
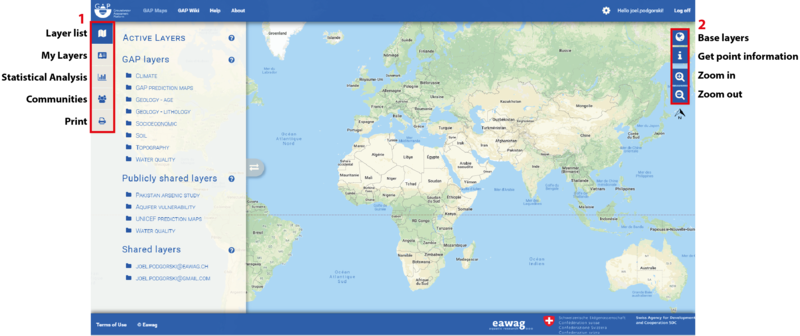
The main functions of GAP Maps are indicated in Figure 3, which are displayed by clicking on the toolbar (3). These functions are explained in detail in the sections: Layers, My Layers, Statistical Analysis, Communities, Manage Account, Print.
Register
Click Register (1) to create a new account using your e-mail address. You must confirm that you are in full agreement with the 'Terms of Use' in order to complete the registration.
Layers list
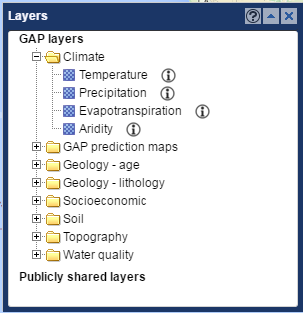
The Layers window lists all available layers, which are grouped into categories such as geology, climate and soil (Figure 4). There are three data types: coverage, polygon and point.
To add a layer to the map, double-click the layer name. Click ![]() next to a layer to display its source and a description of the data.
next to a layer to display its source and a description of the data.
| Data type | Icon |
|---|---|
| Coverage | |
| Polygon | |
| Point | |
Active Layers
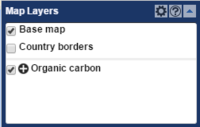
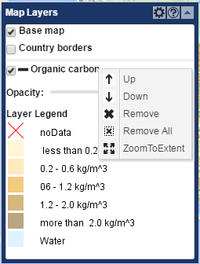
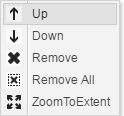
The Map Layers window lists the layers that have been added to the map. The display of layers can be turned on or off by clicking the check-box next to the layer name. Right-clicking on a layer allows you to rearrange, remove or zoom to the extent of a layer (Figure 5).
| Figure 5: Map Layers window collapsed (left), Map Layers window expanded (center) and Tools (right). |
Gap layers
 My Layers
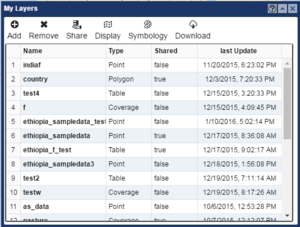
The My Layers window lists all layers uploaded by the user. It also includes functions to add, remove, share, display, download and manipulate the symbology of layers.
A tutorial on this part of the site is available in the video below.
Add
Functionality for uploading geospatial data layers to the map. Click here for detailed instructions.
Remove
To remove a layer, select it in the table and click Remove.
Functionality to share/unshare a layer with an individual user, a community or all users (Public). Click here for a detailed information.
Display
To display a layer (add layer to map), either double-click the layer name in the table, or select layer in the table and click Display.
Symbology
Functionality for changing a layer's symbology. Click here for detailed instructions.
Download
Click Download to save a copy of a layer as a GIS-compatible shapefile or tif.
Rename
 Statistical Analysis
The Statistical Analysis section provides functionality for developing statistical models and probability maps. Click here for detailed information.
 Community
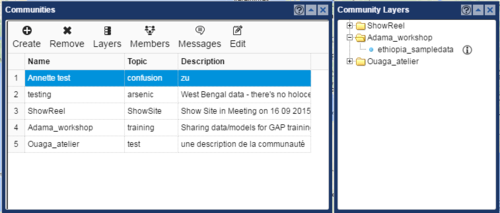
The Communities window lists the communities to which a user belongs.
The Create button opens a window to create a new community. You must enter a name for the community and optionally a topic or description.
The Remove button removes the selected community, which is possible only if you have administrative rights.
The Layers button opens a window that lists all community layers according to community. Double-click a layer to add it to the map.
The Members button allows you to add and remove members by e-mail address and change their administrative rights.
The Messages button allows you to send and view messages for the community.
With the Edit button, you can change the name, topic and description of a community to which you have administrative rights.
 Manage Account
Manage Account ![]() lets you change your password / login preference or delete your account.
lets you change your password / login preference or delete your account.
 Print
Print
Click ![]() to print the displayed map as a PDF. Assign a map title and select the page layout (portrait or landscape) and resolution (DPI). Note that if the background map is displayed, the resolution of the printed map will be limited to 90 DPI. Click Submit when finished.
to print the displayed map as a PDF. Assign a map title and select the page layout (portrait or landscape) and resolution (DPI). Note that if the background map is displayed, the resolution of the printed map will be limited to 90 DPI. Click Submit when finished.
